How to Setup the Timber Talons
To setup the Timber Talons small tractor log skidder attachment, first place the mainframe behind your tractor at the three point. Lay the mainframe on the ground with the flat side down on the ground. Lift from the top of the main frame (the narrow part of the main frame) and put the lift pins (at the bottom of the main frame) into the bottom lift arms of your 3 point and put pins in them. Next grab the top link of the three point and connect to the top hole of the main frame and put a pin in that. Once all three arms of the 3 point are in place and pinned in, you will want to either loosen or tighten the top link so that it make a straight line with the top of the main frame where the top link is connected too.
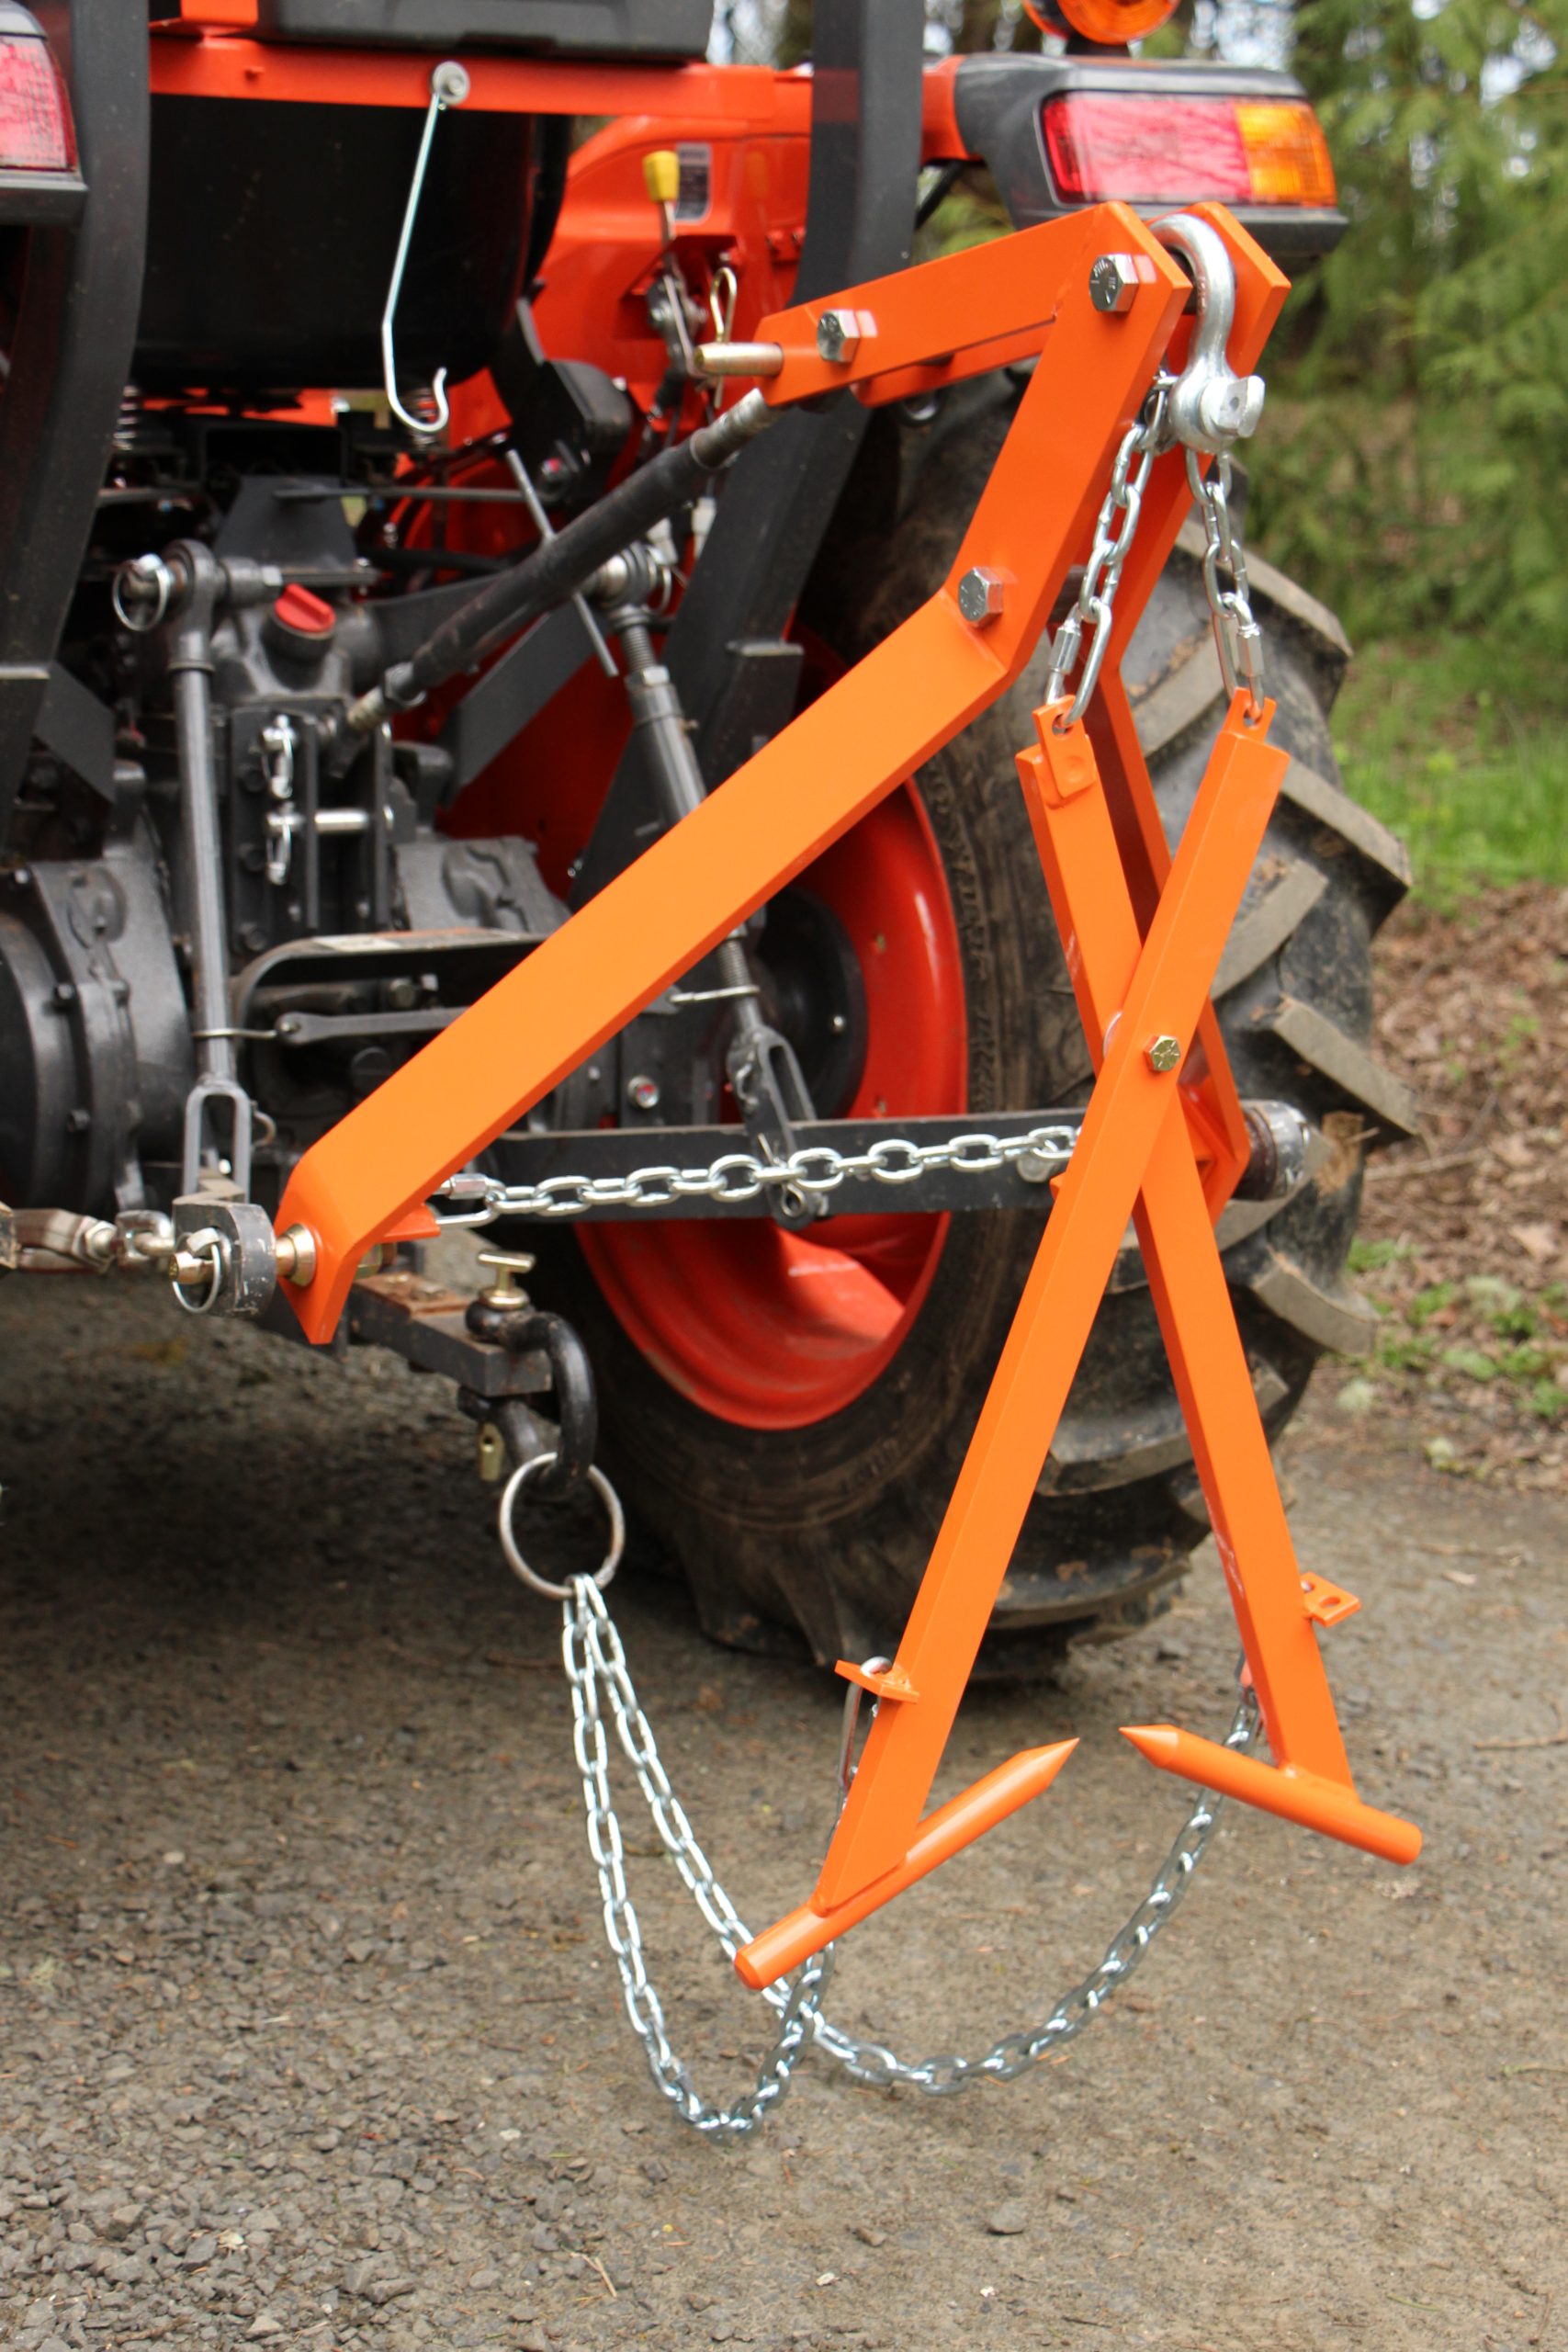
Once that is done, tighten the jam nut on the top link. Next you want to make sure that the bottom lift arms of the 3 point can’t move side to side much at all. Some tractors will have chains/turnbuckles/bars with hole and pins in them on the outside of the 3 point bottom lift arms. Adjust these accordingly so that the lift arms and main frame have very little movement side to side. Next step is putting on the Timber Talons small tractor log skidder on the main frame. First looking at the Talons, you want to connect the lower pull chains which has a metal ring connecting them together to the drawbar with a clevis. This clevis is not supplied, you will put the clevis through the ring and then connect the clevis to the drawbar by the clevis pin.
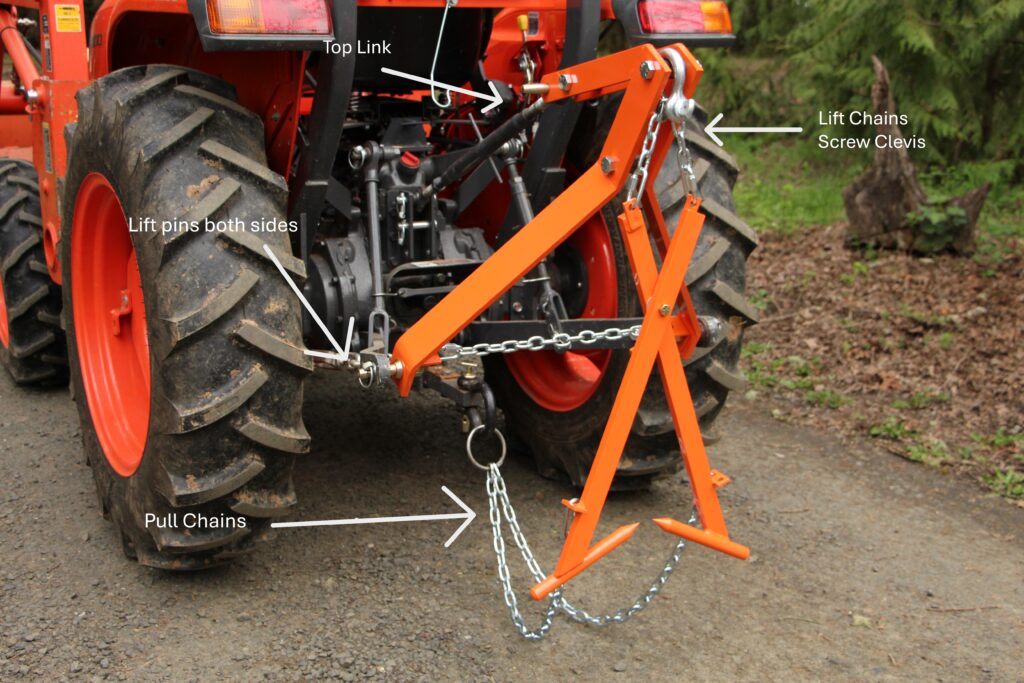
Make sure that where the pull chain connects to the Timber Talons Tongs, this is pointing toward the tractor and the pull chains are not twisted. Then using the screw clevis that is supplied, put the lift chain through the clevis and then put the clevis around the top spacer of the main frame and screw the clevis together. You are now ready to use the Timber Talons.